
ModuleNotFoundError:Python 中没有名为“PIL”的模块
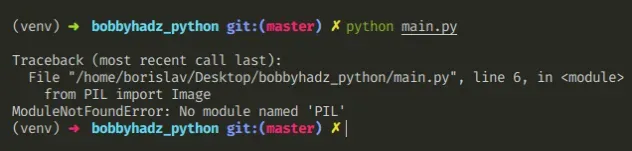
ModuleNotFoundError: No module named ‘PIL’ in Python
Python “ModuleNotFoundError: No module named ‘PIL’” 发生在我们忘记Pillow在导入前安装模块或将其安装在不正确的环境中时。
要解决此错误,请通过运行命令安装模块pip install Pillow
。
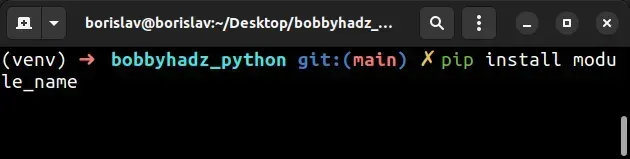
在项目的根目录中打开终端并安装Pillow
模块。
# 👇️ Before installing Pillow, uninstall PIL.
pip uninstall PIL

# 👇️ in a virtual environment or using Python 2
pip install Pillow

# 👇️ for python 3 (could also be pip3.10 depending on your version)
pip3 install Pillow

# 👇️ if you get permissions error
sudo pip3 install Pillow
pip install Pillow --user

# 👇️ if you don't have pip in your PATH environment variable
python -m pip install --upgrade Pillow

# 👇️ for python 3 (could also be pip3.10 depending on your version)
python3 -m pip install --upgrade Pillow

# 👇️ using py alias (Windows)
py -m pip install --upgrade Pillow

# 👇️ for Anaconda
conda install -c conda-forge pillow

# 👇️ for Jupyter Notebook
!pip install Pillow
请注意,我们确保PIL在安装之前先卸载,Pillow因为
Pillow和PIL不能在同一环境中共存。
安装Pillow包后,尝试像这样导入它:
from PIL import Image

im = Image.open("hopper.ppm")

print(im.format, im.size, im.mode)
常见错误原因
出现错误的原因有多种:
- 没有
Pillow通过运行安装包pip install Pillow。 - 在与您正在使用的版本不同的 Python 版本中安装包。
- 全局安装包,而不是在您的虚拟环境中。
- 您的 IDE 运行的 Python 版本不正确。
- 命名您的模块
pil.py,这将影响官方模块。 - 声明一个名为
PILwhich 的变量将隐藏导入的变量。
如果错误仍然存在,请获取您的 Python 版本并确保您使用正确的 Python 版本安装包。
python --version

例如,我的 Python 版本是3.10.4,所以我将Pillow
使用pip3.10 install Pillow.
pip3.10 install Pillow

# 👇️ if you get permissions error use pip3 (NOT pip3.X)
sudo pip3 install Pillow
请注意,版本号对应于我正在使用的版本pip。
pip如果您的计算机上未设置PATH ,请替换pip为
python3 -m pip:
# 👇️ make sure to use your version of Python, e.g. 3.10
python3 -m pip install Pillow
如果错误仍然存在,请尝试重新启动您的 IDE 和开发服务器/脚本。
检查包是否安装
您可以
通过运行命令检查是否Pillow安装了软件包pip show Pillow。
# 👇️ check if you have Pillow installed
pip show Pillow

# 👇️ if you don't have pip set up in PATH
python -m pip show Pillow
该pip show Pillow命令将声明该包未安装或显示有关该包的一堆信息,包括该包的安装位置。
确保你的 IDE 使用正确的 Python 版本
如果未安装该包,请确保您的 IDE
使用的是正确版本的 Python。
Pillow包,或者您的 IDE 可能设置为使用不同的版本。例如,在 VSCode 中,您可以按CTRL + Shift + P或(在 Mac 上为⌘+ Shift+ P
)打开命令面板。
然后在字段中键入“Python 选择解释器”。
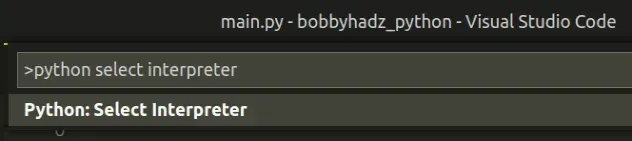
然后从下拉菜单中选择正确的 Python 版本。

在虚拟环境中安装包
如果您使用的是虚拟环境,请确保您是Pillow在虚拟环境中而不是全局安装。
如果您还没有虚拟环境,可以尝试创建一个。
# 👇️ use correct version of Python when creating VENV
python3 -m venv venv

# 👇️ activate on Unix or MacOS
source venv/bin/activate

# 👇️ activate on Windows (cmd.exe)
venv\Scripts\activate.bat

# 👇️ activate on Windows (PowerShell)
venv\Scripts\Activate.ps1

# 👇️ install Pillow in virtual environment
pip install Pillow
如果该python3 -m venv venv命令不起作用,请尝试以下 2 个命令:
python -m venv venvpy -m venv venv
您的虚拟环境将使用用于创建它的 Python 版本。
pil.pyPillow 您也不应该声明一个名为PILas 的变量,这也会影响原始模块。
尝试重新安装包
如果错误未解决,请尝试卸载该Pillow软件包,然后
重新安装。
# 👇️ check if you have Pillow installed
pip show Pillow

# 👇️ if you don't have pip set up in PATH
python -m pip show Pillow

# 👇️ uninstall Pillow
pip3 uninstall PIL
pip3 uninstall Pillow

# 👇️ if you don't have pip set up in PATH
python3 -m pip uninstall Pillow

# 👇️ install Pillow
pip3 install Pillow

# 👇️ if you don't have pip set up in PATH
python3 -m pip install Pillow
尝试重新启动您的 IDE 和开发服务器/脚本。
您也可以尝试升级软件包的版本Pillow。
pip install Pillow --upgrade

# 👇️ if you don't have pip set up in PATH
python -m pip install Pillow --upgrade
无法从源 Pylance 解析导入“PIL”
Pillow当模块未安装或您在 IDE(例如 Visual Studio Code)中选择了不正确的 Python 解释器时,会出现错误“无法从源 Pylance 导入“PIL”” 。
要解决该错误,请Pillow在您的 IDE 中安装并选择正确的 Python 解释器。
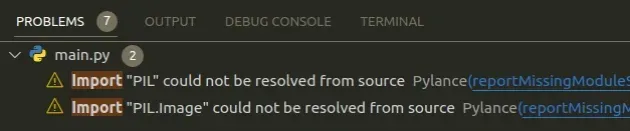
Import "PIL" could not be resolved from source Pylance(reportMissingModuleSource) [Ln 1, Col 8]
Import "PIL.Image" could not be resolved from source Pylance(reportMissingModuleSource) [Ln 1, Col 8]
确保在您的 IDE 中选择了正确的 Python 解释器
如果您的机器上安装了多个 Python 版本,您可能使用了不正确的版本安装了Pillow包,或者您的 IDE 可能被设置为使用不同的版本。
例如,在 Visual Studio Code 中,您可以:
- 按
CTRL + Shift + P或(在 macOS 上为⌘+Shift+P)打开命令面板。
然后在搜索字段中键入“Python 选择解释器” 。
- 从下拉菜单中选择正确的 python 版本。
如果错误仍然存在,请尝试重新启动您的 IDE 和开发服务器/脚本。VSCode 经常出现故障,重启即可解决问题。
如果错误未解决,请尝试使用 Visual Studio Code 终端安装Pillow模块。
您可以按键盘上的 CTRL + ` (反引号)打开 Visual Studio 代码终端。
CTRL+Shift+P
打开终端后,Visual Studio Code 将自动激活您的虚拟环境(如果有的话)。
运行pip install Pillow命令。
pip install Pillow
如果错误仍然存在,请尝试通过指定路径来选择 Python 解释器:
- 按
CTRL + Shift + P或(在 Mac 上为⌘+Shift+P)打开命令面板。 - 在字段中键入“Python 选择解释器” 。
- 选择“输入解释器路径…”。
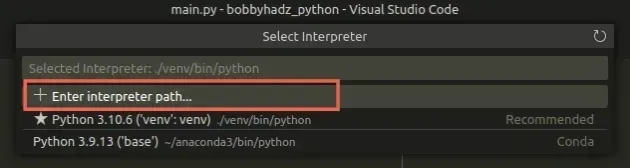
- 单击“查找”。
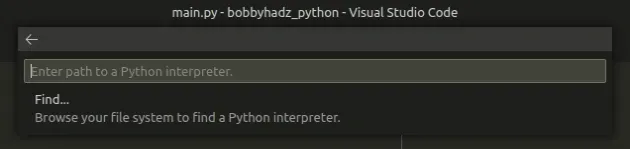
- 在打开的窗口中,导航到您的 Python 可执行文件:
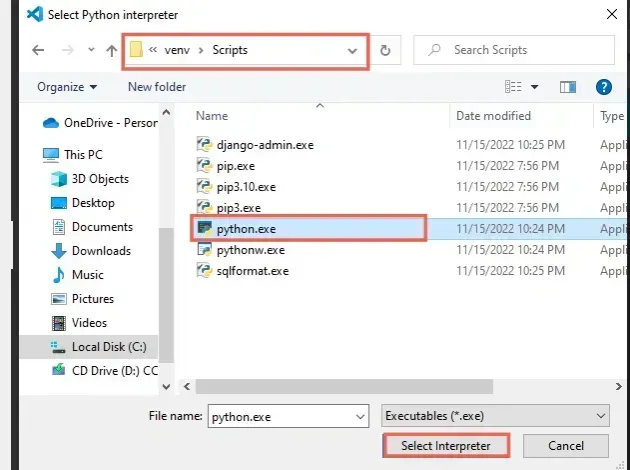
- 如果您在 Windows 上有虚拟环境,请单击您的
venv文件夹,然后双击该Scripts文件夹,选择python.exe文件,然后选择解释器。
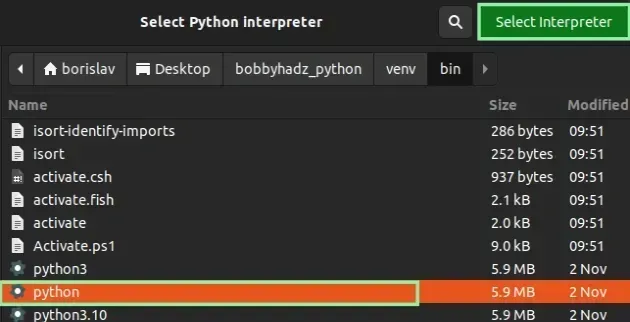
- 如果您在 macOS 或 Linux 上有虚拟环境,请单击您的
venv
文件夹,然后双击该bin文件夹,选择python文件,然后选择解释器。
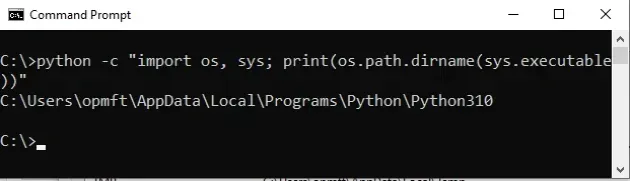
- 如果您没有虚拟环境,请使用以下命令之一获取您的
python.exe或python可执行文件的路径,指定文件路径并选择可执行文件。
where python

python -c "import sys; print(sys.executable)"
如果错误仍然存在,请尝试重新启动您的 IDE 和开发服务器/脚本。
或者,使用注释来禁用警告
如果这些建议都没有帮助,您可以使用注释来禁用 IDE 中的 Pylance 警告。
from PIL import Image  # type: ignore

print(Image)
您只需将# type: ignore命令添加到与导入语句相同的行中,即可禁用对特定导入的检查。
Pillow.- 在 Windows 上安装 Pillow (PIL)
- 在 macOS 或 Linux 上安装 Pillow (PIL)
- 在 Visual Studio Code 中安装 Pillow (PIL)
- 在 PyCharm 中安装 Pillow (PIL)
- 在 Anaconda 中安装 Pillow (PIL)
- 在 Jupyter Notebook 中安装 Pillow (PIL)
在 Windows 上安装 Pillow (PIL)
Pillow在 Windows 上安装模块:
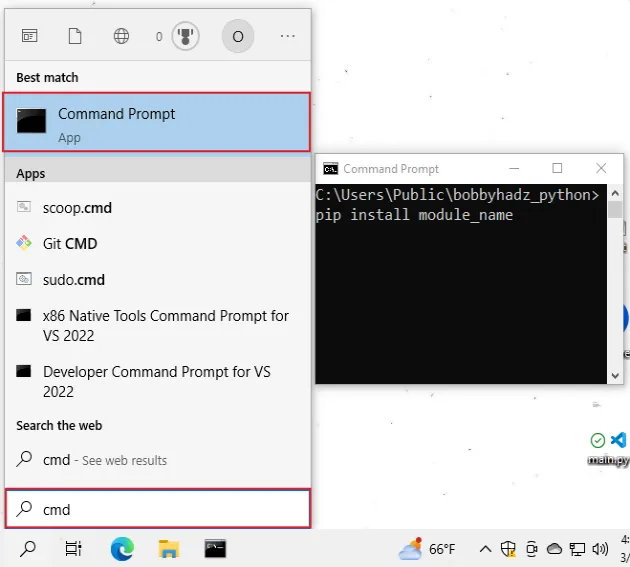
- 在搜索栏中键入 CMD,然后打开命令提示符应用程序。
- 键入
pip install Pillow并按 Enter。
# 👇️ Before installing Pillow, uninstall PIL.
pip uninstall PIL

pip install Pillow

# 👇️ for Python 3
pip3 install Pillow

# 👇️ if you don't have pip in your PATH environment variable
python -m pip install --upgrade Pillow

# 👇️ for Python 3
python3 -m pip install --upgrade Pillow

# 👇️ using py alias
py -m pip install Pillow

# 👇️ if you get permissions error
pip install Pillow --user

# 👇️ for Anaconda
conda install -c anaconda pillow
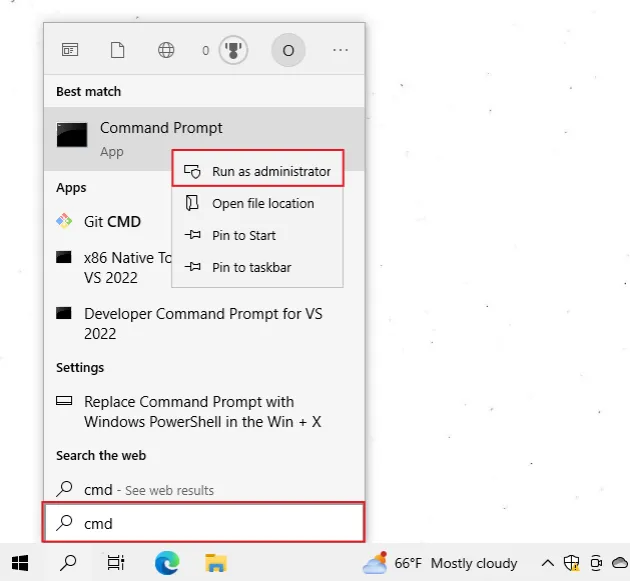
如果命令不成功,请尝试以管理员身份运行 CMD。
如果你收到错误
‘pip’ is not recognized as an internal or external command,python -m安装时使用命令Pillow。
python -m pip install Pillow

python3 -m pip install Pillow

py -m pip install Pillow
Pillow或者,您可以在虚拟环境中安装该模块:
- 打开项目的根目录。
- 在资源管理器中按下
Shift并右键单击。
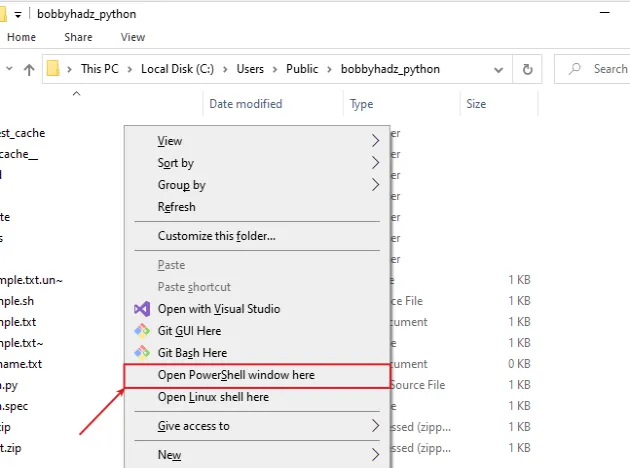
- 单击“在此处打开 PowerShell 窗口”。
- 运行以下命令。
# 👇️ might also be: "python3 -m venv venv"
python -m venv venv

# 👇️ activate on Windows (PowerShell)
venv\Scripts\Activate.ps1

# 👇️ activate on Windows (cmd.exe)
venv\Scripts\activate.bat

# 👇️ install Pillow in virtual environment
pip install Pillow
如果该python -m venv venv命令不起作用,请尝试以下 2 个命令:
python3 -m venv venvpy -m venv venv.
如果您看到无法加载 ps1 的错误消息
,因为在此系统上禁用了运行脚本,请运行以下命令,在出现提示时键入“yes”并重新运行激活命令。
Set-ExecutionPolicy RemoteSigned -Scope CurrentUser
Pillow使用命令验证模块是否已安装。 pip show Pillowpip show Pillow pip3 show Pillow python -m pip show Pillow python3 -m pip show Pillow
该pip show Pillow命令将声明该包未安装或显示有关该包的一堆信息,包括该包的安装位置。
在 macOS 或 Linux 上安装 Pillow (PIL)
要在 macOS 或 Linux 上安装 Pillow:
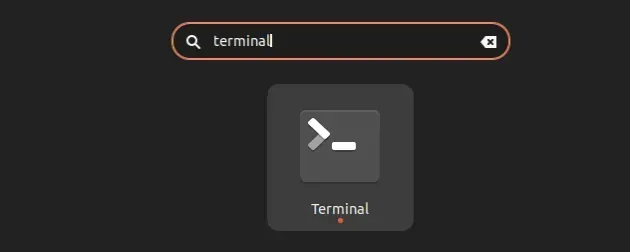
- 搜索“终端”并启动应用程序。
- 键入
pip install Pillow并按 Enter。
# 👇️ Before installing Pillow, uninstall PIL. pip uninstall PIL pip install Pillow # 👇️ for Python 3 pip3 install Pillow # 👇️ if you get permissions error sudo pip3 install Pillow # 👇️ if you don't have pip in your PATH environment variable python -m pip install Pillow # 👇️ for python 3 python3 -m pip install Pillow # 👇️ alternative if you get permissions error pip install Pillow --user # 👇️ for Anaconda conda install -c anaconda pillow
如果您收到未发现的错误pip,请使用该python -m命令。
python -m pip install Pillow python3 -m pip install Pillow
如果出现权限错误,请在命令前加上sudo.
sudo pip install Pillow sudo pip3 install Pillow
或者,您可以Pillow在虚拟环境中安装该软件包:
- 在项目的根目录中打开终端。
- 运行以下命令。
# 👇️ could also be "python -m venv venv" python3 -m venv venv # 👇️ activate virtual env on macOS or Linux source venv/bin/activate # 👇️ install Pillow in virtual environment pip install Pillow
您的虚拟环境将使用用于创建它的 Python 版本。
python3 -m venv venv命令不起作用,请改用。 python -m venv venv您可以使用该pip show命令来验证
Pillow是否已
成功安装。
pip show Pillow
pip3 show Pillow

python -m pip show Pillow
python3 -m pip show Pillow
该pip show Pillow命令将声明该包未安装或显示有关该包的一堆信息。
在 Visual Studio Code 中安装 Pillow (PIL)
在 Visual Studio Code 中安装 Pillow:
- 按键盘上的 CTRL + ` (反引号)打开终端。
- 运行
pip install Pillow命令以安装Pillow模块。
# 👇️ Before installing Pillow, uninstall PIL.
pip uninstall PIL

pip install Pillow

# 👇️ for Python 3
pip3 install Pillow

# 👇️ if you get permissions error
sudo pip3 install Pillow

# 👇️ if you don't have pip in your PATH environment variable
python -m pip install Pillow

# 👇️ for python 3
python3 -m pip install Pillow

# 👇️ using py alias
py -m pip install Pillow

# 👇️ alternative if you get permissions error
pip install Pillow --user

CTRL+Shift+P在 Visual Studio 代码中安装 Python 模块时,请确保
您的 IDE 配置为使用正确的 Python 版本。
按CTRL+Shift+P或(在 Mac 上为⌘+ Shift+ P)打开命令面板。
然后在字段中键入“Python 选择解释器”。
然后从下拉菜单中选择正确的 Python 版本。
python --version如果您需要获取您的 Python 版本,可以使用该命令。
python --version
python3 --version
如果您还没有虚拟环境,也可以尝试创建一个。
# 👇️ could also be "python -m venv venv" or "py -m venv venv"
python3 -m venv venv

# 👇️ activate on Unix or MacOS
source venv/bin/activate

# 👇️ activate on Windows (cmd.exe)
venv\Scripts\activate.bat

# 👇️ activate on Windows (PowerShell)
venv\Scripts\Activate.ps1

# 👇️ install Pillow in virtual environment
pip install Pillow
您的虚拟环境将使用用于创建它的 Python 版本。
在 PyCharm 中安装 Pillow (PIL)
在 PyCharm 中安装 Pillow:
- 按
Alt+F12键盘打开终端。 - 运行
pip install Pillow命令以安装Pillow模块。
# 👇️ Before installing Pillow, uninstall PIL.
pip uninstall PIL

pip install Pillow

# 👇️ for Python 3
pip3 install Pillow

# 👇️ if you get permissions error
sudo pip3 install Pillow

# 👇️ if you don't have pip in your PATH environment variable
python -m pip install Pillow

# 👇️ for python 3
python3 -m pip install Pillow

# 👇️ using py alias
py -m pip install Pillow

# 👇️ alternative if you get permissions error
pip install Pillow --user

或者,您可以使用 IDE 本身来安装模块。
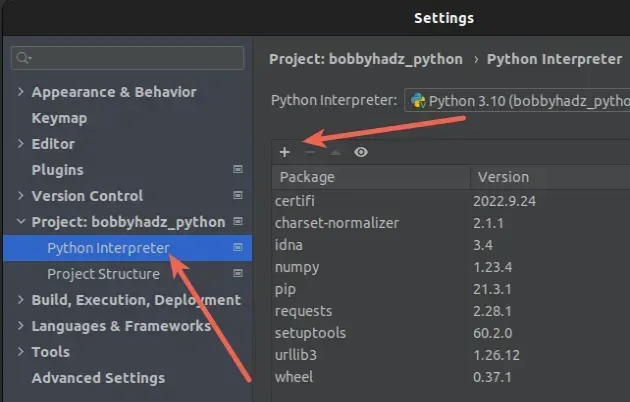
- 单击“文件”>“设置”>“项目”>“Python 解释器”。
- 单击
+图标并键入Pillow。 - 单击“安装包”。
单击“文件”>“设置”>“项目”>“Python 解释器”。
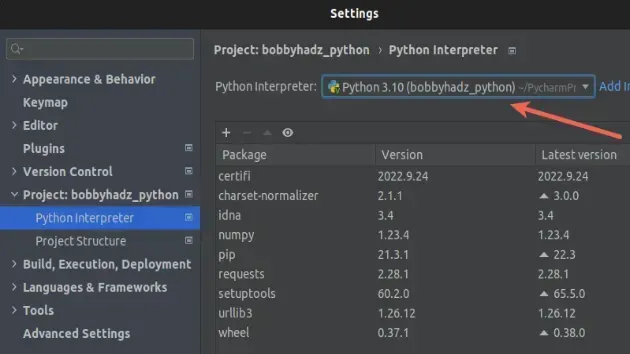
然后从下拉菜单中选择正确的 Python 版本。
python --version如果您需要获取您的 Python 版本,可以使用该命令。
python --version
python3 --version
在 Anaconda 中安装 Pillow (PIL)
在 Anaconda 中安装 Pillow:
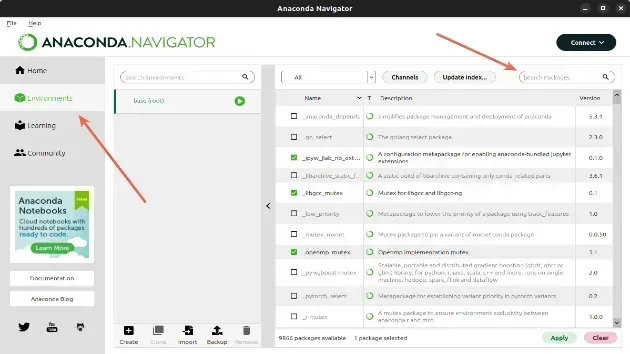
- 打开您的 Anaconda 导航器。
- 单击“环境”并选择您的项目。
Pillow在右侧的搜索栏中输入。- 勾选
Pillow包并单击“应用”。
或者,您可以Pillow使用命令安装包。
如果您使用的是 Windows,请搜索“Anaconda Prompt”并打开该应用程序。
如果您使用的是 macOS 或 Linux,请打开您的终端。
运行以下命令来安装Pillow包。
# 👇️ using conda
conda install -c anaconda pillow

# 👇️ Alternatively use `pip`
pip install Pillow

# 👇️ for Python 3
pip3 install Pillow

# 👇️ if you get permissions error
sudo pip3 install Pillow

# 👇️ if you don't have pip in your PATH environment variable
python -m pip install Pillow

# 👇️ for python 3
python3 -m pip install Pillow

# 👇️ using py alias
py -m pip install Pillow

# 👇️ alternative if you get permissions error
pip install Pillow --user
如果您需要使用 Anaconda 安装特定版本的软件包,请单击
以下文章。
在 Jupyter Notebook 中安装 Pillow (PIL)
在 Jupyter Notebook 中安装 Pillow:
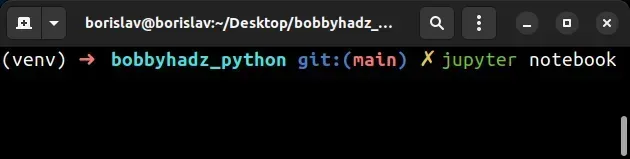
- 打开您的终端并输入“jupyter notebook”。
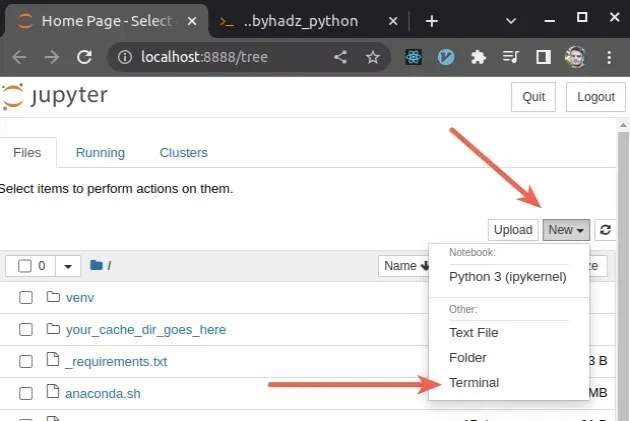
- 单击浏览器选项卡中的“新建”,然后单击“终端”。
- 键入
pip install Pillow并按 Enter。
# 👇️ Before installing Pillow, uninstall PIL.
pip uninstall PIL

# 👇️ using pip
pip install Pillow

# 👇️ for Python 3
pip3 install Pillow

# 👇️ if you get permissions error
sudo pip3 install Pillow

# 👇️ if you don't have pip in your PATH environment variable
python -m pip install Pillow

# 👇️ for python 3
python3 -m pip install Pillow

# 👇️ using py alias
py -m pip install Pillow

# 👇️ using conda
conda install -c anaconda Pillow

# 👇️ alternative if you get permissions error
pip install Pillow --user
或者,您可以使用 Python ipykernel。
- 打开您的终端并输入“jupyter notebook”。
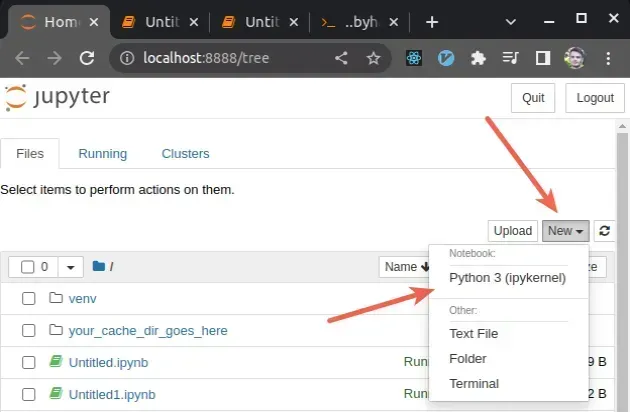
-
单击“新建”,然后单击“Python 3 (ipykernel)”。
-
键入
!pip install Pillow并单击“运行”。
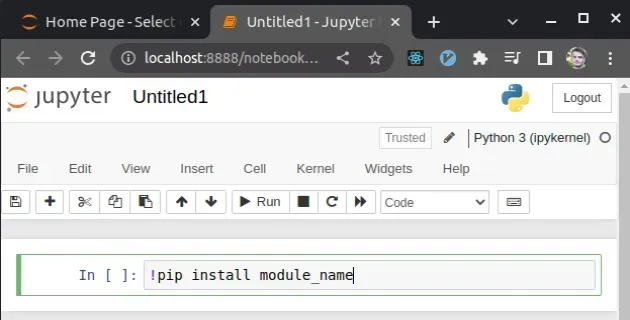
请注意,pip install如果您使用此方法,该命令必须以感叹号为前缀。
!pip install Pillow
键入命令后,单击“运行”以安装模块Pillow。
如果出现权限错误,例如“ [WinError: 5] Access is denied”,请将
--user选项添加到安装命令中。
!pip install Pillow --user

如果错误仍然存在,请尝试
重新启动 Jupyter 内核
并重新运行该命令。